How to photograph the northern lights on iPhone
The northern lights this winter will be phenomenal, with multiple geomagnetic storms having already pounded the planet since the season began in late-August. the reason for this is the power that comes hurtling through space in plasma that was ejected from the sun in coronal mass ejections, which are stronger this year than last as we approach solar maximum. This power combined with the power contained in our mobile phones make it easier than ever to shoot the northern lights with our phones. Here’s how: -
First off, we need the right conditions. We need clear, dark skies and we need geomagnetic and auroral activity. If we can see the aurora, we can shoot it with our phone. The best extra tool we can have is a tripod, holding our iPhone firmly fixed for a long exposure. The way the iPhone camera works for long exposures is slightly different to the way a mirrorless or DSLR camera works. If we have one quick, bright flash of light with our DSLR it will burn into the image, whereas this isn’t the case with iPhone. When we’re handheld with our iPhone we can shoot up to 15-seconds, but if we have a tripod holding our iPhone steady the sensors inside will allow us to shoot for up to 30 seconds.
When we’re handheld with our iPhone we can shoot up to 15-seconds, but if we have a tripod holding our iPhone steady the sensors inside will allow us to shoot for up to 30 seconds.
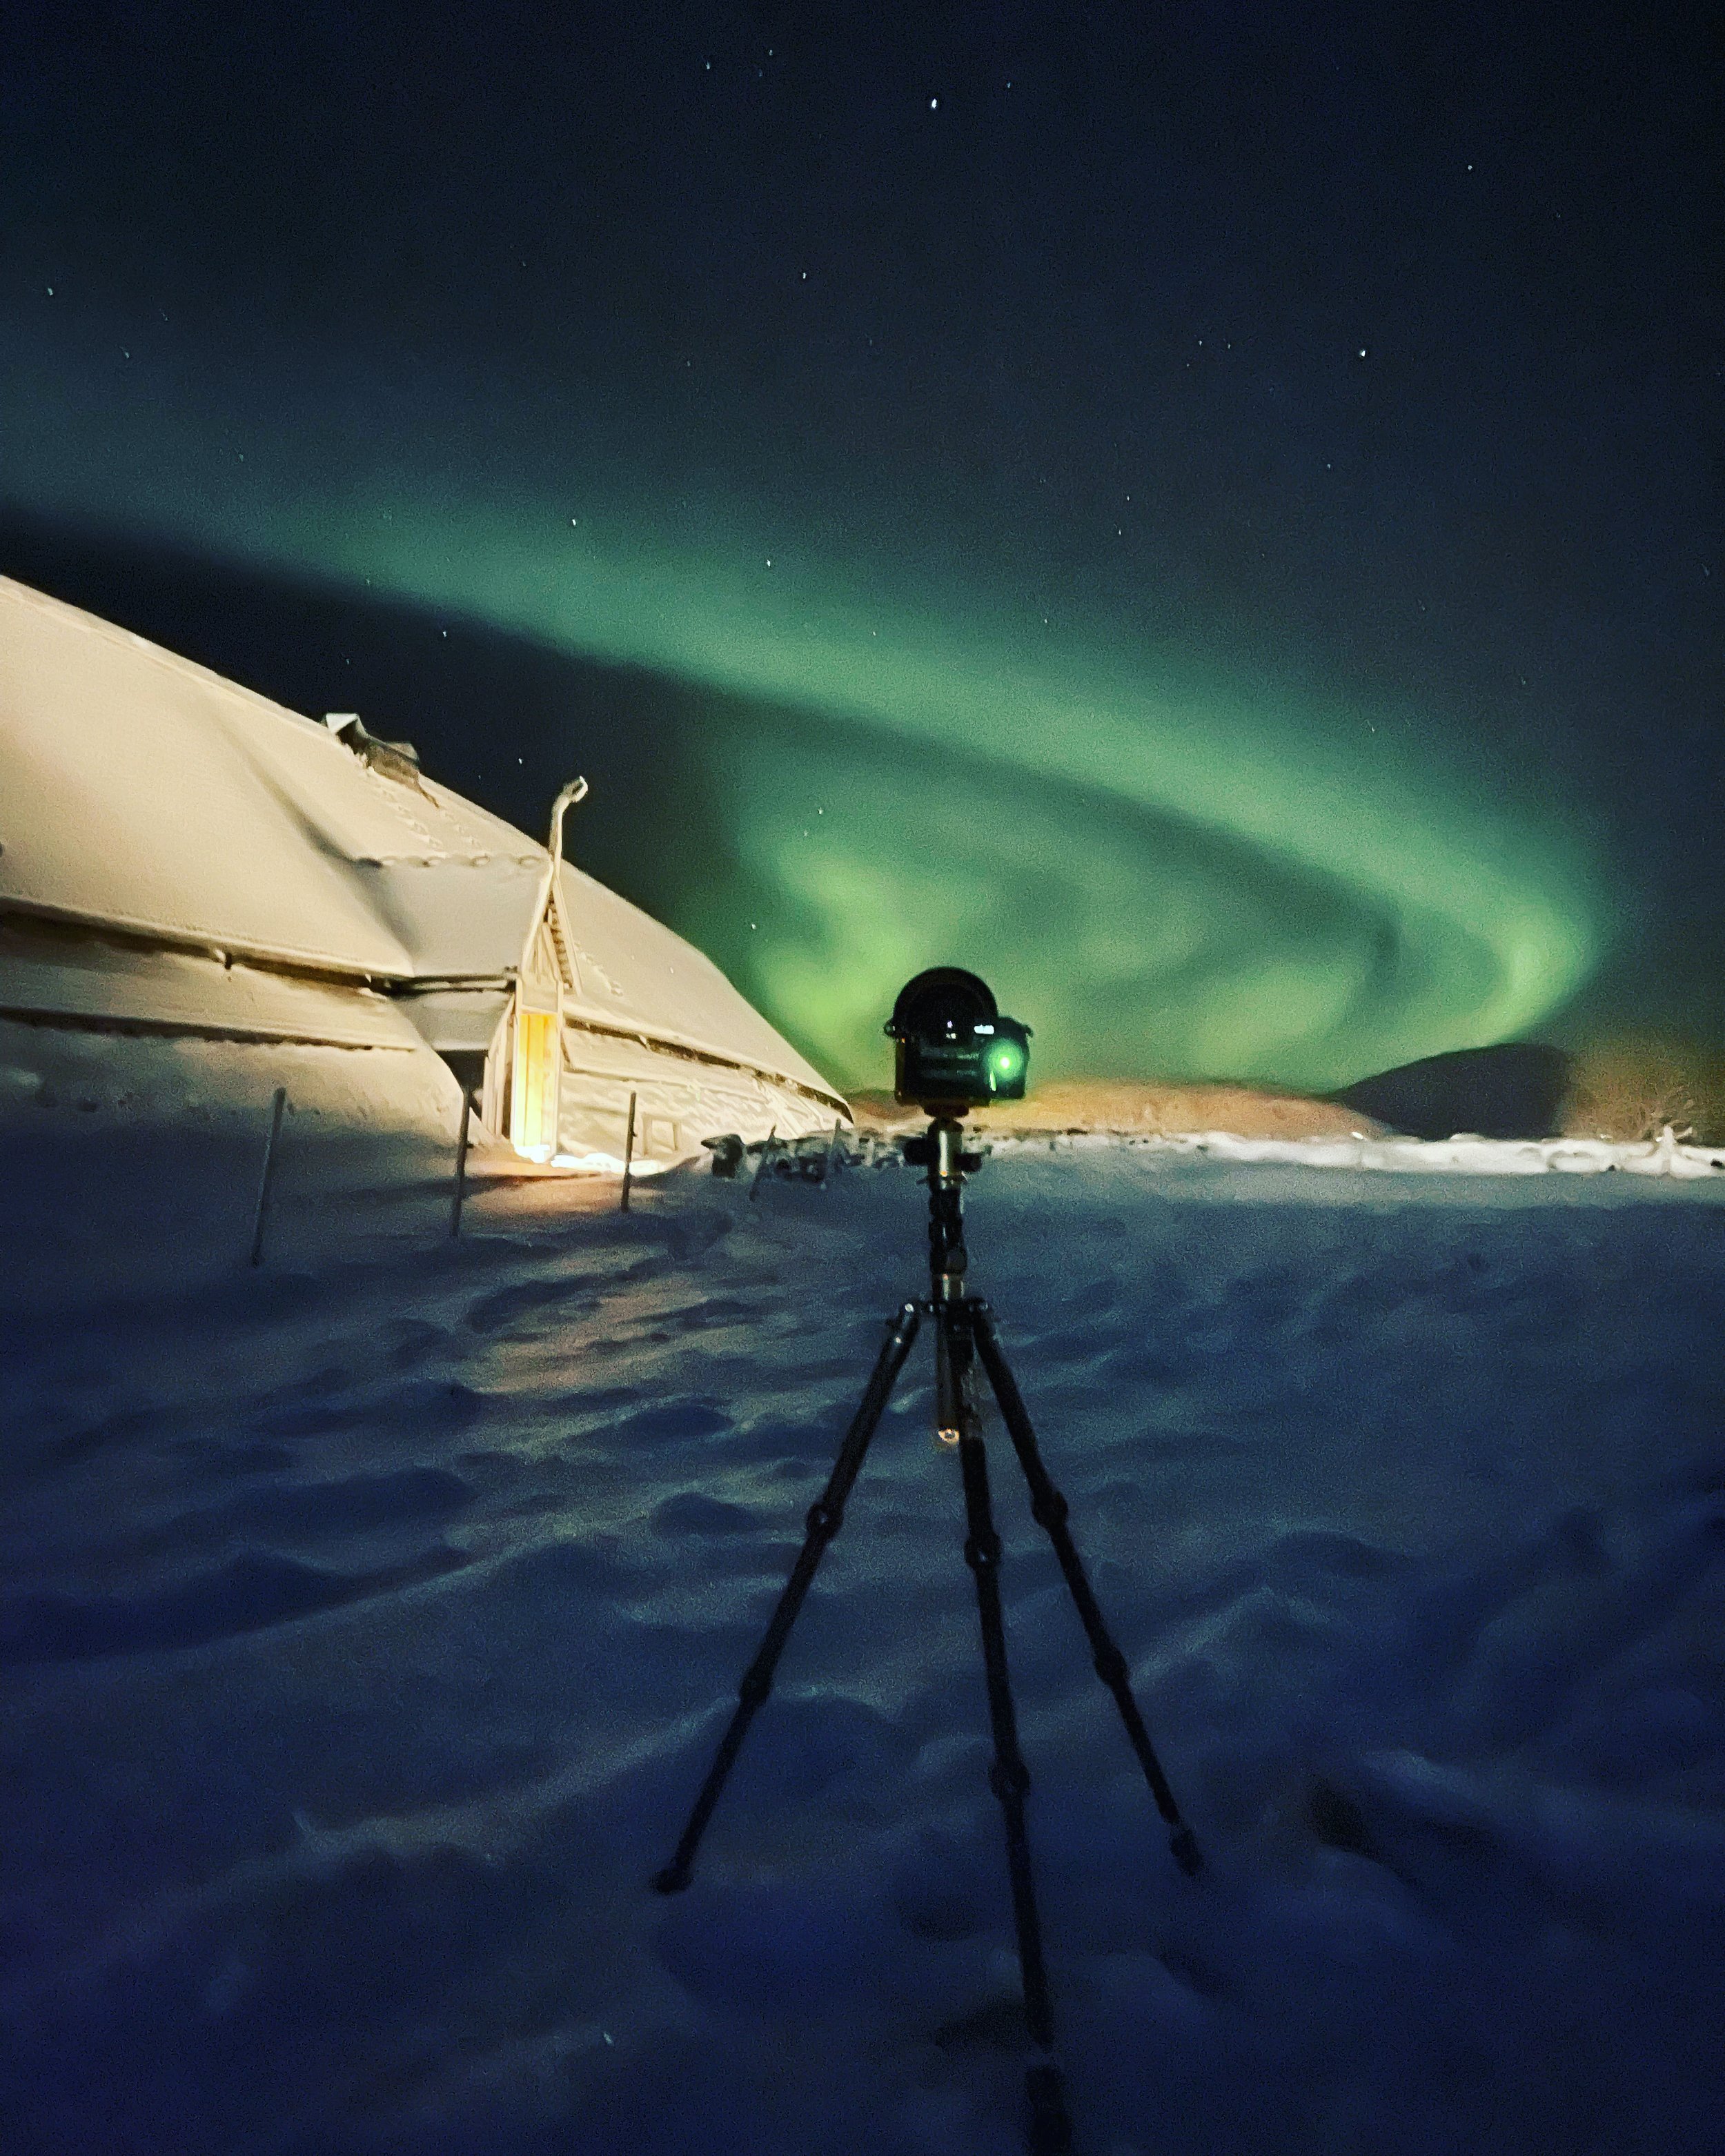
We need a sustained light source for our iPhone to capture it effectively because it’s stacking shower exposures together to create the final long exposure image. We can see how the magic (or algorithm) in the iPhone camera interprets the light across multiple shots and combines it in this example, with a strong foreground light at the Lofotr Viking Museum contrasted against the night sky.
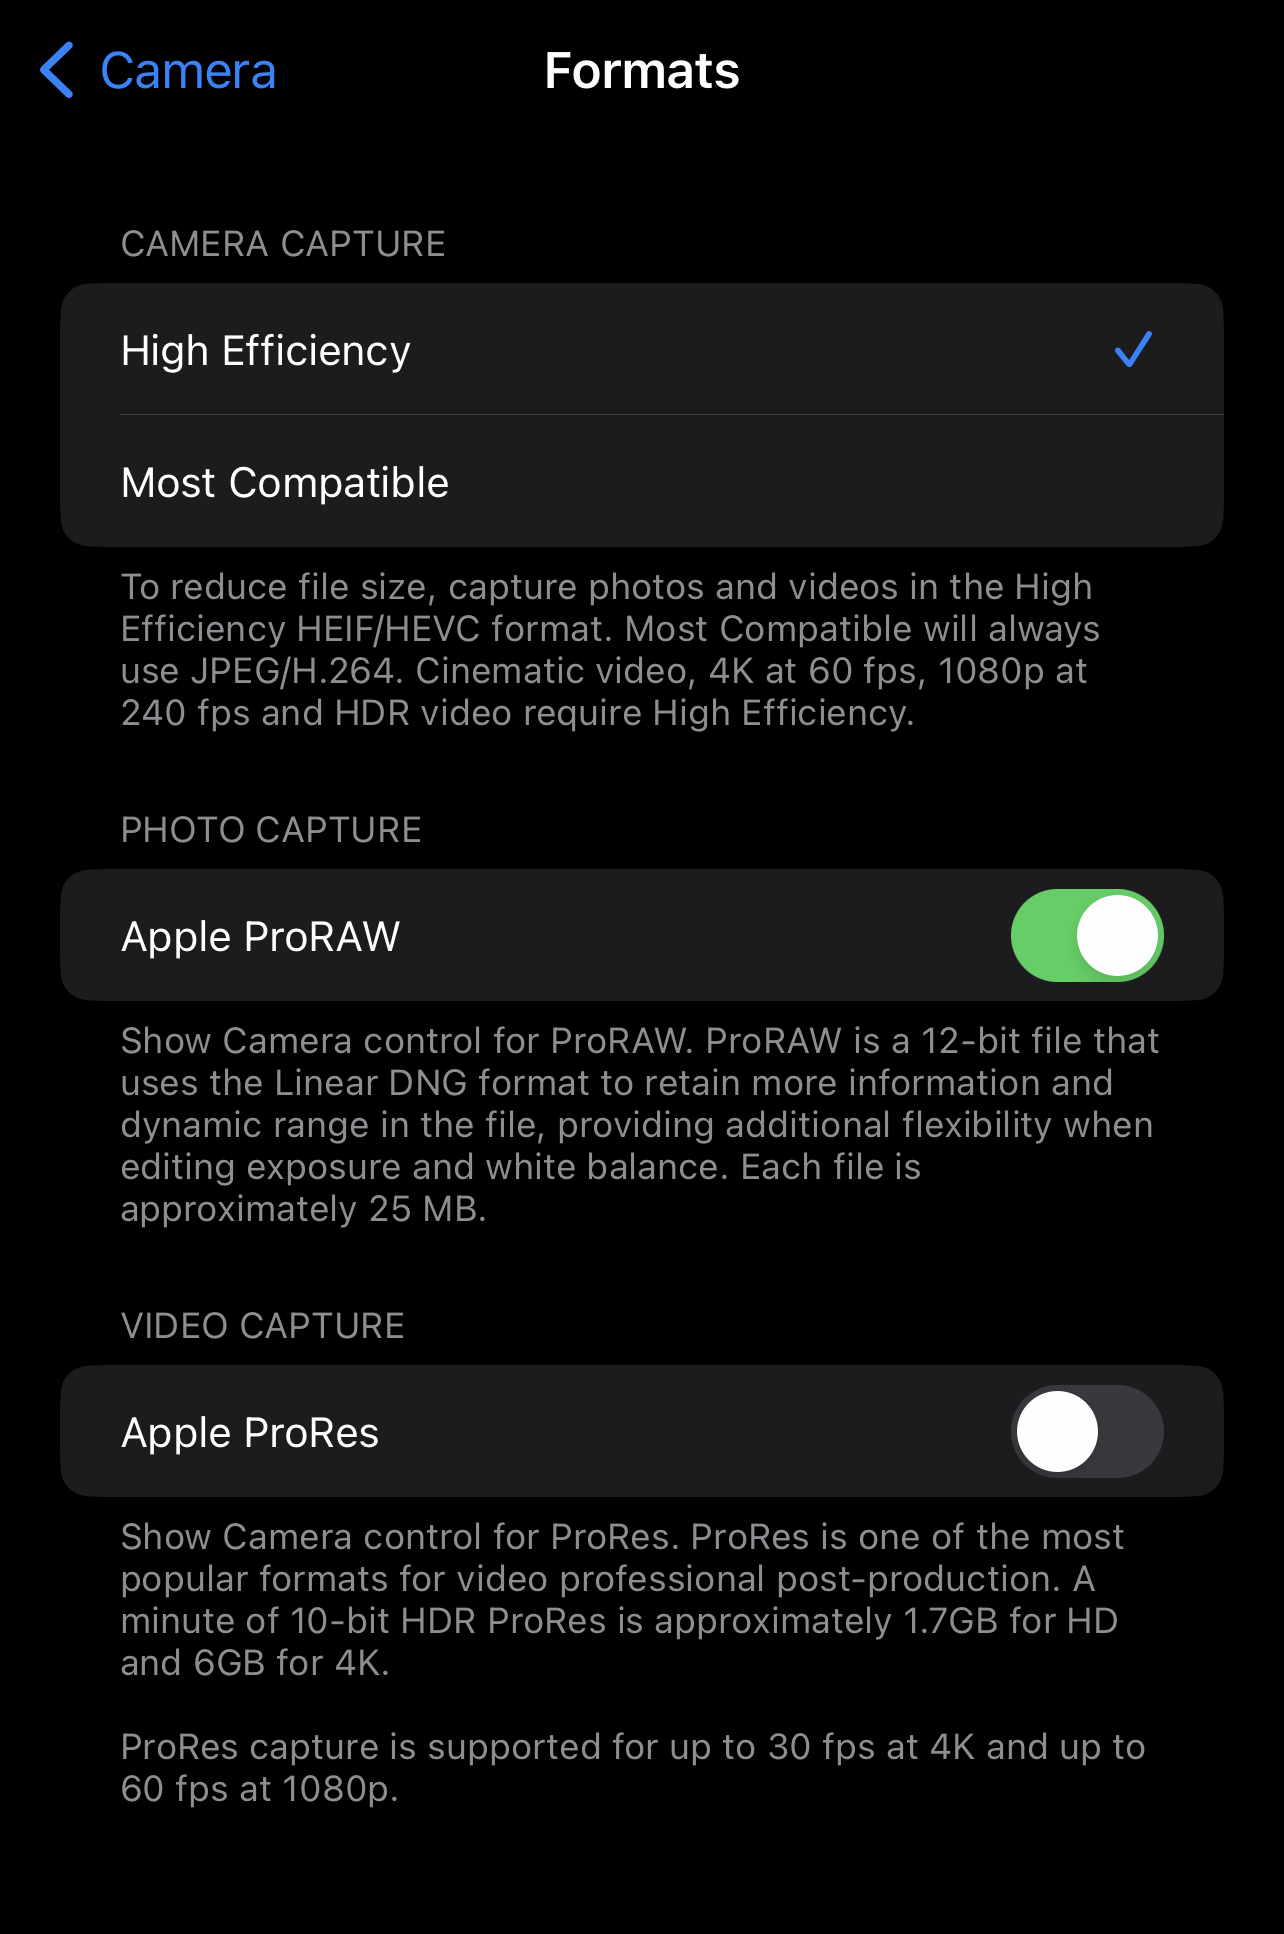
To afford ourselves the greatest opportunities when to comes to editing our northern lights shot, retaining detail in the dark areas of the image, it’s important to shoot RAW photos> This allows greater control in the native Photos app as well as apps like Adobe Lightroom Mobile. Turn it on in Settings > Camera > Formats > Apple ProRAW.
Now we’re shooting the best format, we can open up our camera app and point at the northern lights. To set ourselves up for a long exposure, either handheld or whilst mounted on a tripod, we just need to tap the arrow at the bottom of the screen to access more controls, then adjust our exposure time with the slider.

The symbol is for Night Mode, and it looks like an eclipsed moon within a full moon. You’ll also notice that I’m using the 1x lens because it has the widest aperture of the three lenses on the iPhone, meaning more light can enter and hit the sensor. When we’ve double checked that we’re shooting RAW by looking in the top right corner, we’re ready to shoot.
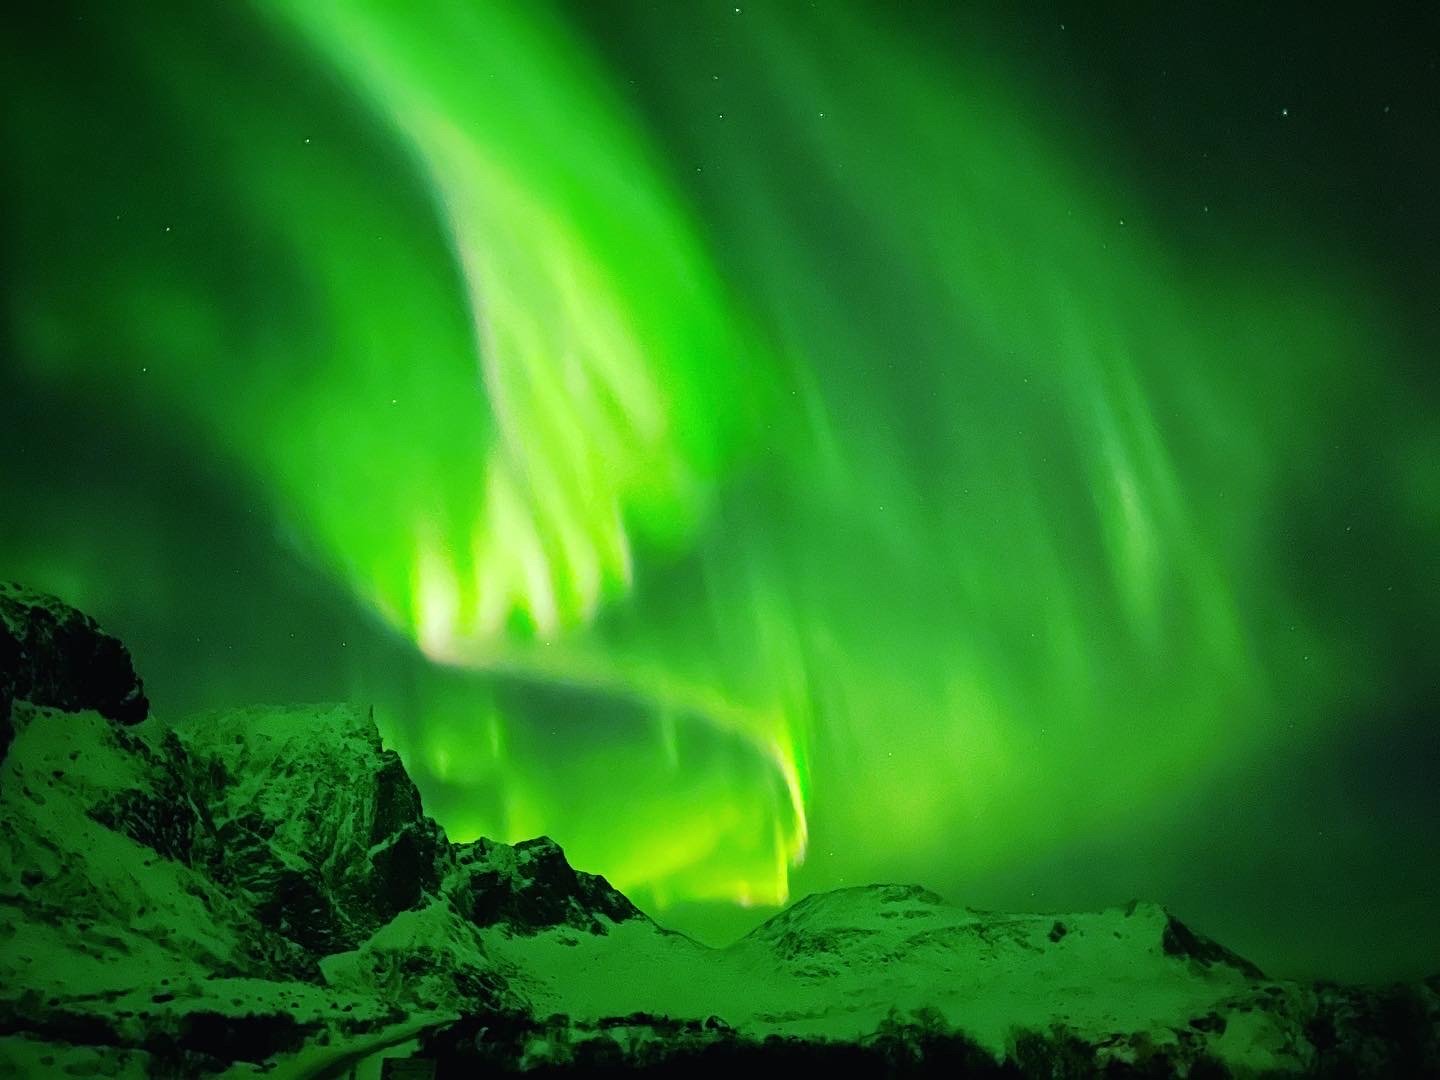
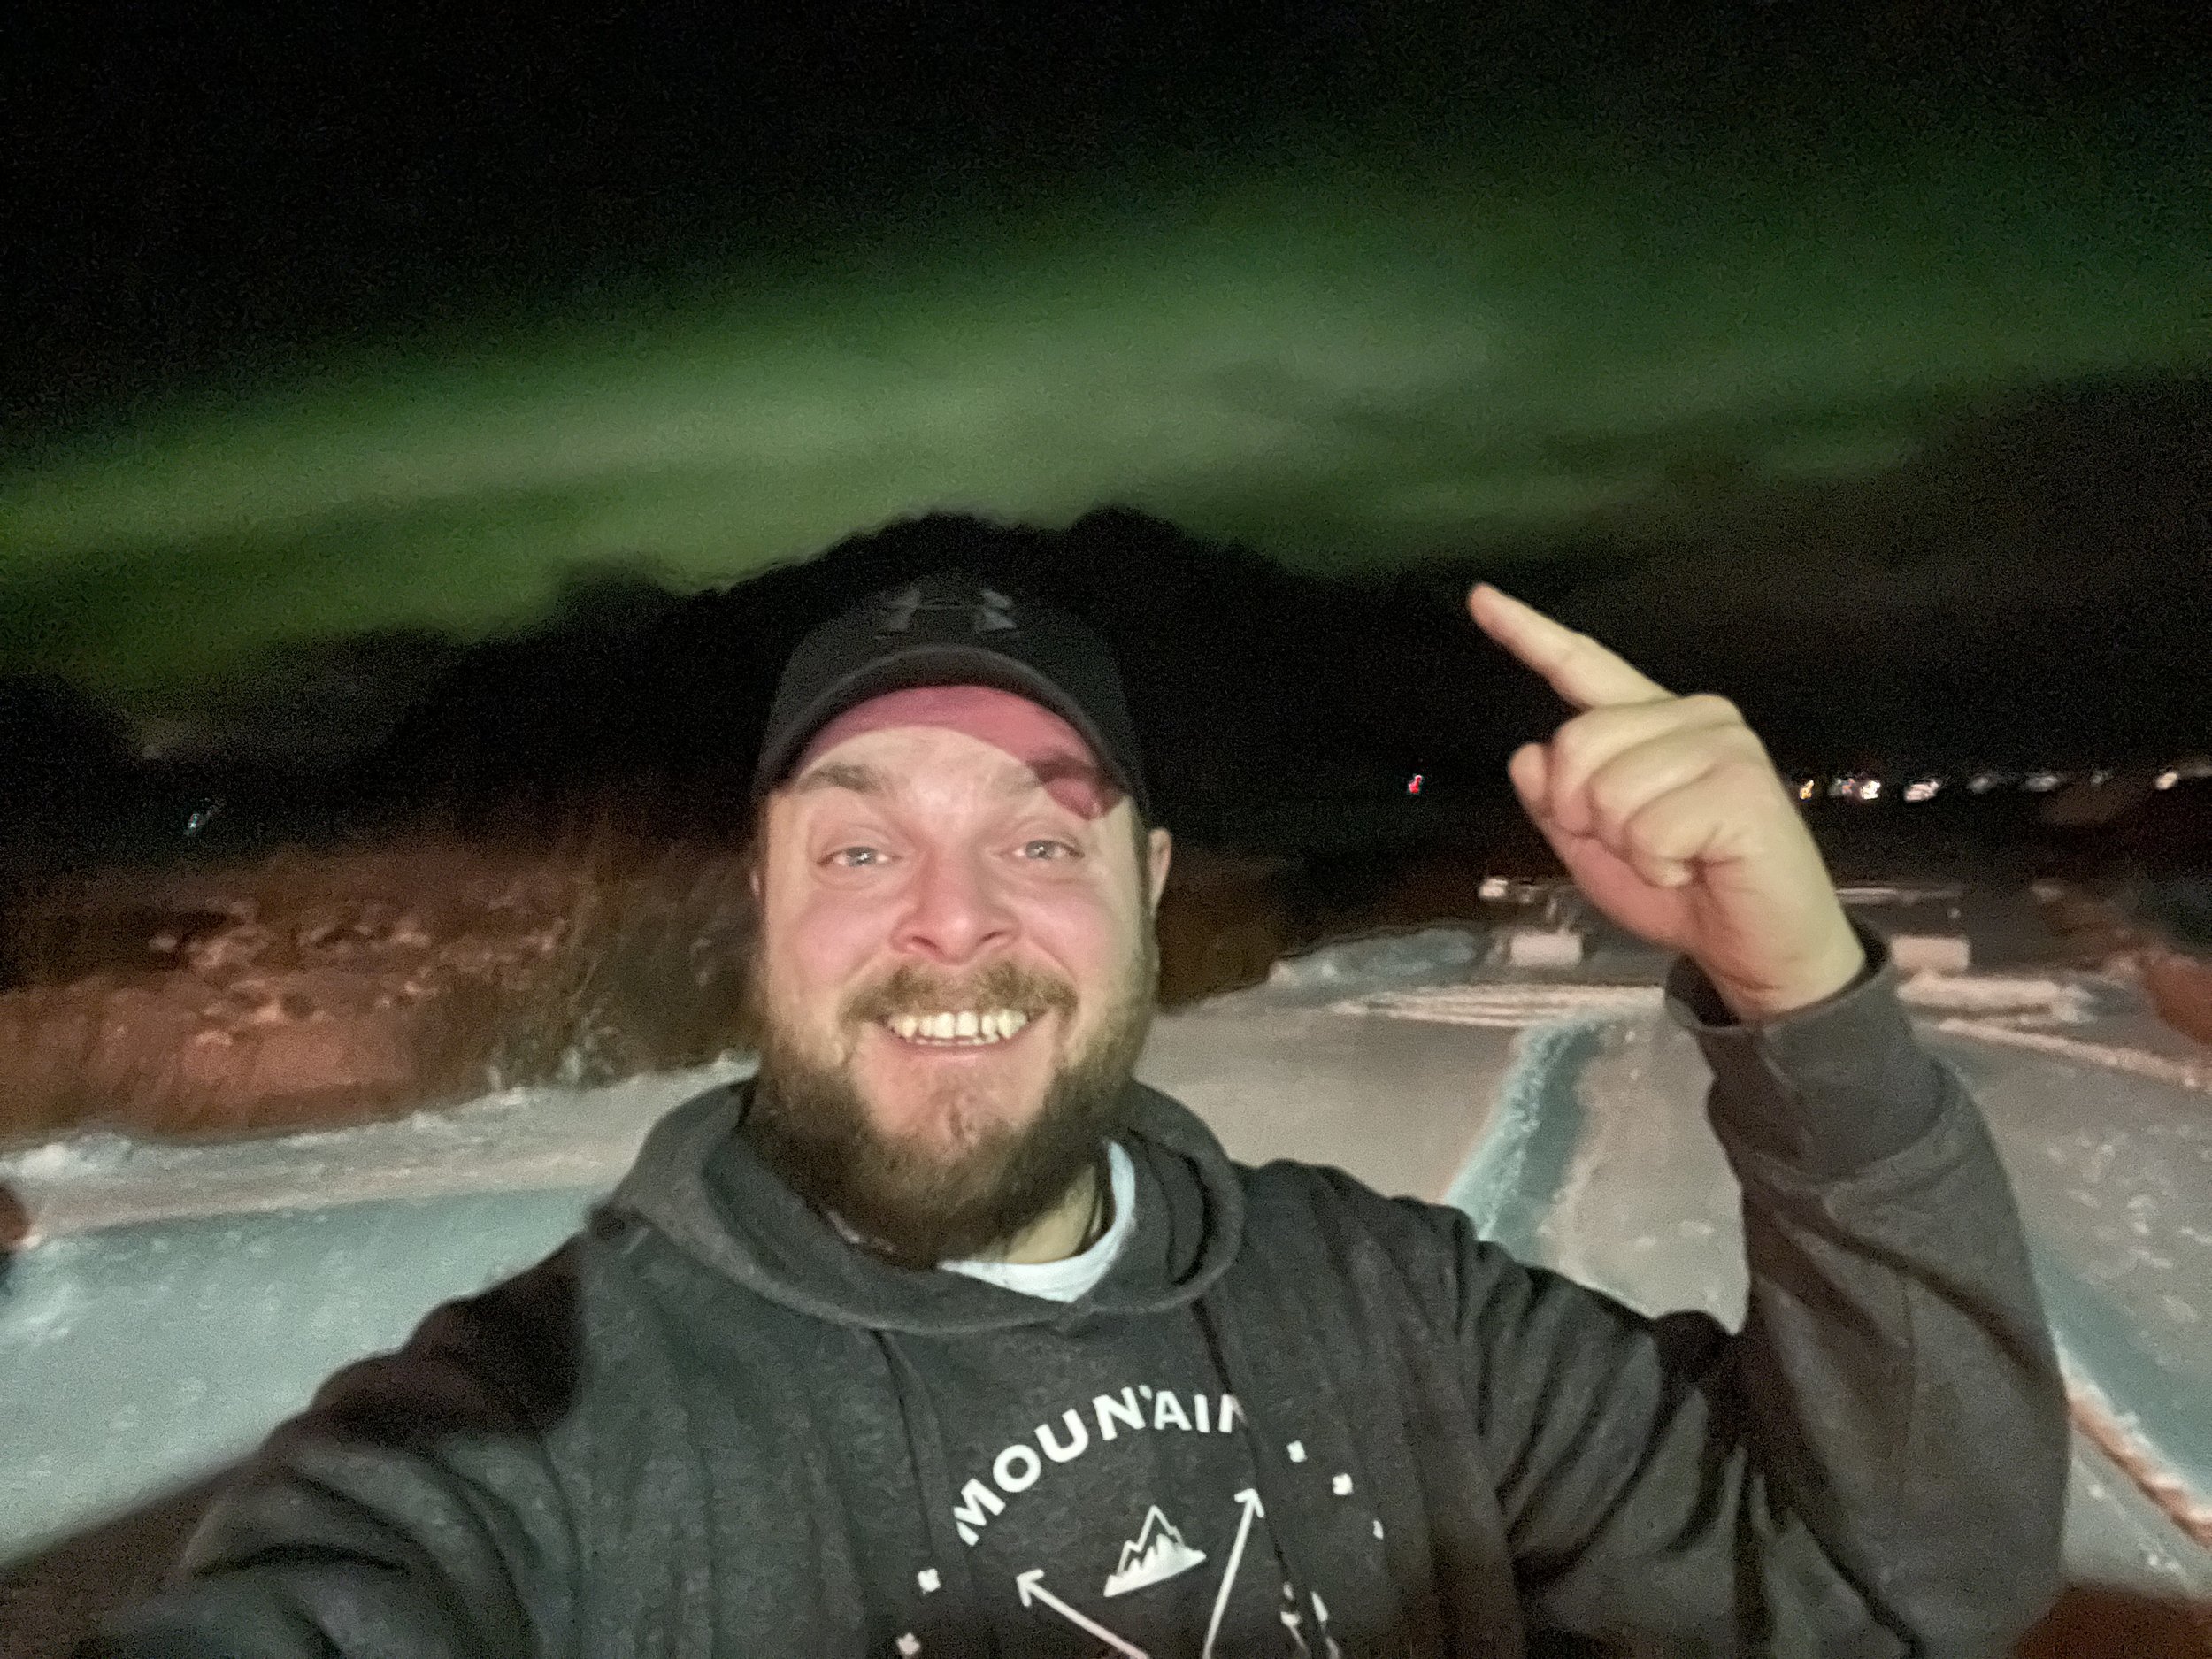
My best single piece of advice for shooting the northern lights is to include a foreground. Something on earth like a mountain or a building will give a sense of place and scale, rather than shooting nothing but sky. And the dancing aurora is always great for a selfie!
I hope this is useful, and I wish you luck with your aurora hunt!
Much love
Dave
